
Building your own electric skateboard opens up a new realm of personal transportation. It’s not just about the thrill and the speed, it’s about understanding the mechanics, the interaction of components, and the creation of a means of travel that is attuned to your needs and style. Whether you’re an experienced skateboarder looking for a DIY project or someone just getting started in the world of electric skateboards, this guide will provide you with all the information you need on how to build an electric skateboard from scratch. So grab your tools and let’s get to work!
Table of Contents
Why Build Your Own Electric Skateboard?
Building your own electric skateboard offers a unique and rewarding experience that cannot be replicated by purchasing a pre-made board. There are several reasons why building your own electric skateboard is worth the effort and time.
Firstly, building your own electric skateboard allows for customization and personalization. When you build your own board, you have the freedom to choose every component, from the deck to the wheels to the motor. This means you can tailor the skateboard to your specific needs and preferences. Whether you want a board that excels in speed and performance or a board that prioritizes stability and comfort, building your own electric skateboard gives you the flexibility to create the perfect ride.
Building your own electric skateboard is also a great learning experience. Throughout the process, you will gain valuable knowledge and skills in mechanics, electronics, and problem-solving. You will also learn how the various components of an electric skateboard work together and how to troubleshoot any issues that may arise. This knowledge can be applied to future projects or even help you in repairing and maintaining your skateboard down the line.
Additionally, building your own electric skateboard can save you money in the long run. While the upfront costs of purchasing all the necessary components may seem daunting, building your own board allows you to avoid the markup that comes with buying a pre-made skateboard. You can often find better deals on individual components, and you have the freedom to choose high-quality parts that fit your budget. Electric Skateboards typically range from $300-$1000 but some premium models can range up to $1500-$2500 if you choose to buy prebuilt instead of building your own.
As an added bonus, if any components need to be replaced or upgraded in the future, you can do so without having to buy a whole new skateboard.
Finally, building your own electric skateboard is a great way to connect with the skating community and meet like-minded individuals. There are numerous online forums and communities dedicated to DIY electric skateboards, where you can share your progress, ask for advice, and learn from others who are passionate about building their own boards. The sense of camaraderie and support within these communities is invaluable, and it can enhance your overall skateboarding experience.
Understanding Electric Skateboard Components
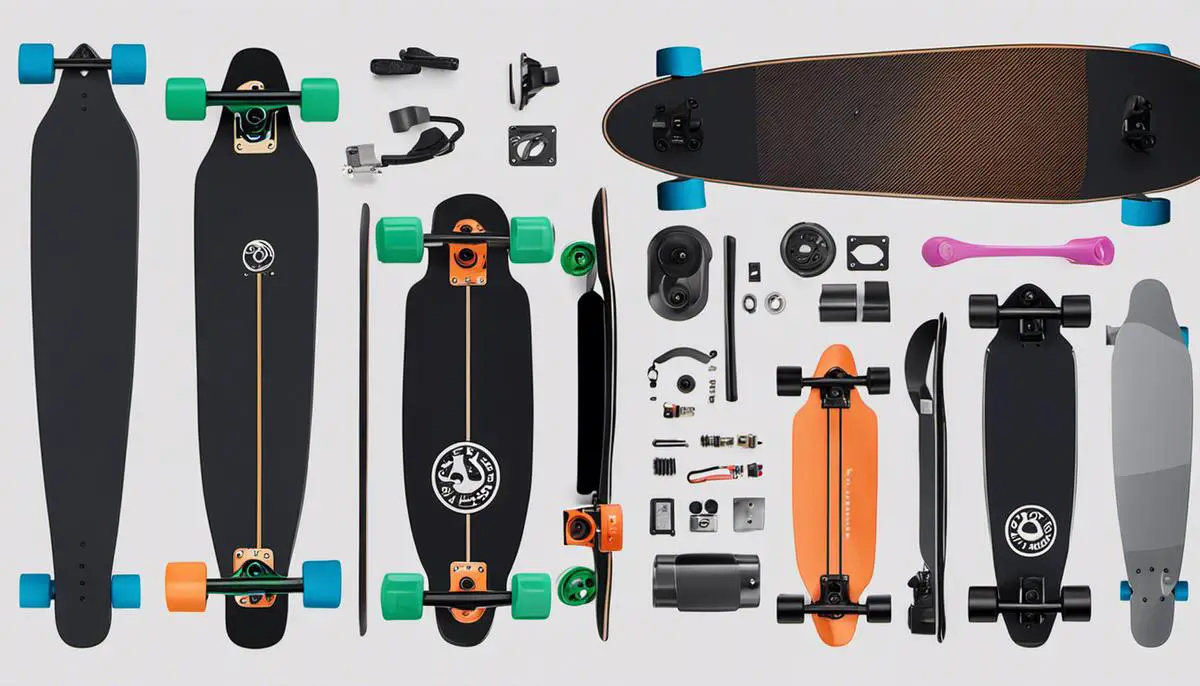
Building an Electric Skateboard: The Essential Components
Curiosity and interest in the power of technology often result in the creation of innovative devices. Take the electric skateboard, for instance. This gadget, which seamlessly blends convenience and fun, has sparked interest among technology buffs worldwide. Let’s delve deep into the details and discuss the essential components needed to build an electric skateboard.
First off, the foundation of any skateboard, electric or not, is the deck. This is where feet rest and movements are controlled. Ride comfort and control largely depend on the shape, length, and material of the skateboard deck. Usually, electric skateboard decks are made of layers of bamboo or Canadian maple due to these materials’ durability and flexibility. However, the choice of deck ultimately depends on the individual rider’s preference and balance.
Next, it’s time to shift our focus to the wheels. The size and type of wheels play a vital role in the overall performance of the electric skateboard. Larger wheels facilitate higher speeds but take more time to accelerate. On the other hand, smaller wheels accelerate faster but are slower. The type of terrain on which the skateboard will be used also influences the choice of wheels. Remember the golden rule: softer wheels for rough terrains and harder wheels for smooth surfaces.
Electric skateboards can’t function without a reliable battery, making it one of the most significant components. The battery’s capacity directly determines the skateboard’s range, so choose wisely. Lithium-ion batteries are a popular choice due to their lightweight construction and longer life span. However, they can be expensive. Standard lead-acid batteries may be a more cost-effective solution, although they add considerable weight.
Another critical component is the motor, the heart of the skateboard’s power. The choice boils down to two types: hub motors and belt-driven motors. Hub motors provide a stealthy and smooth look as they integrate into the wheels. On the contrary, belt-driven motors offer more torque and power and have a customizable gearing ratio for speed or hill climbing.
To control the electric skateboard, an Electronic Speed Controller (ESC) is an integral part that must be chosen. It acts as the bridge between the motor and batteries, modulating the speed and braking system based on signals received from a hand-held remote control. A good ESC contributes to a smoother, safer ride.
Finally, assembling these parts can spell the difference between a smooth ride and a rough tumble. Various tools are required, including screwdrivers, wrenches, a power drill, and possibly a soldering iron. The assembly process can be challenging, but for many skaters, it’s part of the captivating experience of creating an electric skateboard.
An electric skateboard is an intriguing blend of mechanical components and modern technology. Like any piece of technology, continuous experimentation and upgrades can lead to the creation of a high-performing and personalized piece of equipment. Go ahead and be part of this exciting journey in personal transportation. Suit up for the ride of your life on your DIY electric skateboard. Lets get Building!

How To Build an Electric Skateboard: Necessary Tools and Materials
When selecting your components, it’s important to keep in mind the weight and size of each item. The heavier your electric skateboard, the more difficult it will be to maneuver and control. It’s also important to consider the terrain you’ll be riding on, as this will affect your choice of wheels and trucks. If you’re planning on riding on rough surfaces or steep hills, for example, you’ll need components that can handle the challenge. Lastly, don’t forget to have fun with the process! Building your own electric skateboard is a rewarding and exciting project that allows you to customize your ride to your exact specifications. So grab your tools and get building!
To begin building your own electric skateboard, you’ll need to gather all the necessary materials and tools. While this may seem overwhelming at first, having everything you need before you start will make the process much smoother. Here’s a list of the materials and tools you’ll need:
1. Skateboard Deck: Start by selecting a deck that suits your riding style and preferences. Look for a deck made from sturdy materials that can withstand the weight and power of an electric skateboard.
Wooden decks tend to be lighter than composite boards, but are generally not as durable.
2. Trucks and Wheels: Choose trucks and wheels that are compatible with your deck. Trucks are the metal components that attach the wheels to the deck, and they come in different sizes and styles. Make sure to select wheels that are appropriate for your riding style and will fit your truck and board combo. Whether you prefer speed or stability, there is the perfect combo out there.
3. Electric Skateboard DIY Kit: Invest in a reliable electric skateboard kit that includes motors (hub or belt driven), ESC (Electronic Speed Controller), and a remote control. These components are essential for powering and controlling your electric skateboard.
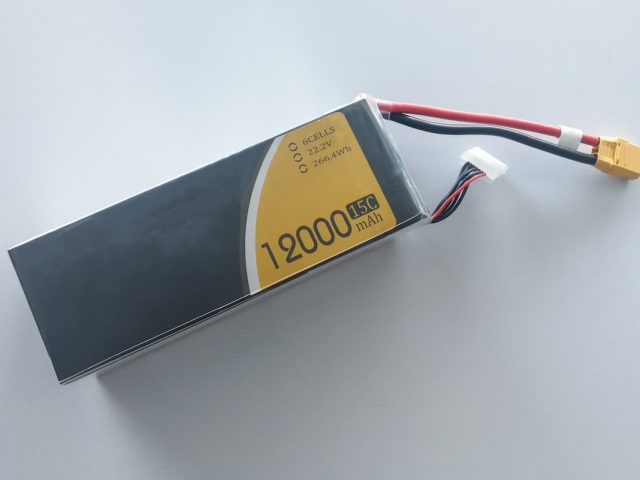
4. Battery and Charger: Look for a high-quality lithium-ion battery and charger that can provide enough power to run your electric skateboard. Consider factors such as voltage and capacity to ensure a longer riding time.
5. Mounting Hardware: Purchase mounting hardware, such as bolts, nuts, and washers, to secure the various components to your deck. More often than not, your DIY kit will include these.
6. Tools: Gather a set of tools that will help you assemble your electric skateboard, including a skateboard tool, wrenches, screwdrivers, and Allen keys. Having the right tools on hand will make the process much easier.
7. Safety Gear: Don’t forget to prioritize safety! Invest in a helmet, knee pads, elbow pads, and wrist guards to protect yourself while riding your electric skateboard. After a few broken ribs, I can testify that safety gear is an utmost priority.
Before you start building, take the time to research and choose high-quality components that are compatible with each other. Consider reading reviews and asking for recommendations from other DIY electric skateboarders. By gathering the right materials and tools, you’re setting yourself up for success and ensuring a smooth building process.
Now that you have everything you need, it’s time to move on to the next step: assembling your electric skateboard. Stay tuned for our next section, where we’ll guide you through this process step by step.
The Assembly Process
Deck and Trucks
Lets move onto the process of assembling your electric skateboard. Installing and setting up the trucks, a crucial component that significantly impacts steering, stability, and maneuverability, will be first on the list. Choose between reverse kingpin and double kingpin trucks, each with different maneuverability attributes perfect for different terrains.
Start by placing your deck on a flat surface and position the trucks on the underside of the deck. Make sure to align the truck holes with the holes on the deck. Next, insert the bolts through the holes, followed by the washers, and then the nuts. Tighten the nuts securely, but be careful not to overtighten as it may damage the deck. Repeat this process for all the truck holes, ensuring that the trucks are evenly and securely attached to the deck.
Wheels and Bushings
Once the trucks are in place, it’s time to install the wheels. Slide the bushings onto the axles of the wheels, making sure they are seated properly. Then, insert the wheels onto the trucks, ensuring they spin freely and smoothly. Give each wheel a gentle spin to check for any misalignment or resistance.
Now that you have successfully assembled the trucks and wheels on the deck, it’s important to check their stability. Stand on the deck and apply some weight to ensure that it feels balanced and sturdy. Gently rock back and forth to test the trucks’ responsiveness. If you feel any wobbling or instability, double-check the tightness of the nuts and bolts. This can be tuned in to your exact riding style once the build is complete and you have ridden to get a feel for the board.
Motor and Motor Mount
Now that you have successfully assembled the deck and trucks of your electric skateboard, it’s time to move on to the next step: installing the motor and mounts. This step is essential as it will provide the power needed to turn your skateboard on and get on the road.
Begin by positioning the motor mount onto the underside of the deck, aligning it with the trucks and making sure it is centered. Once you have found the right position, mark the holes where the mount will be attached. Then, using a drill with an appropriate drill bit, carefully create the holes for the screws.
Next, attach the motor mount to the deck using the screws provided, making sure to tighten them securely to ensure it is stable and won’t move during rides. Double-check the alignment of the mount to ensure that it is straight and properly positioned.
Now it’s time to install the motor onto the motor mount. Depending on the specific motor and mount you have chosen, the installation process may vary. Follow the manufacturer’s instructions carefully to ensure proper installation. Typically, you will need to attach the motor to the mount using screws or bolts, making sure it is securely fastened.
ESC (Electronic Speed Controller)
Once the motor is in place, connect the motor’s wires to the Electronic Speed Controller (ESC) following the manufacturer’s instructions(see Wiring and Connecting Components Section). The ESC is responsible for controlling the motor and regulating its speed. Make sure to securely connect all the wires and double-check the connections to avoid any loose or faulty connections. Pro Tip: Attach Velcro to the back of the ESC and to the enclosure and attach them together before putting the cover over your motor.
At this point, you should also attach any necessary brackets or supports to secure the motor and motor mount. These brackets will provide additional stability and ensure that the motor stays securely in place.
Before moving on to the next steps, take a moment to double-check the alignment and stability of the motor and mount. Ensure that the motor is straight and properly positioned, and that the motor mount is securely attached to the deck. This will ensure optimal performance and prevent any issues while riding.
Wiring and Connecting Components
Now that you have successfully installed the motor, motor mount, and ESC onto your electric skateboard, it’s time to move on to the next step: wiring and connecting the components. This step is crucial as it will bring all the different parts of your electric skateboard together and ensure they work harmoniously.
Start by gathering all the necessary components for the wiring process, including the Electronic Speed Controller (ESC), battery, and remote control. Make sure you have read the instructions for each component thoroughly and familiarize yourself with the wiring diagram provided. This will ensure that you make the correct connections and prevent any potential damage to the components.
Begin by connecting the battery to the ESC. Typically, the ESC will have labeled wires or ports for connecting the battery. Match the positive and negative terminals of the battery to the corresponding terminals on the ESC and securely attach them. Double-check the connections to ensure they are tight and secure.
Next, connect the motor to the ESC (If you decided not to do that in the steps above). Again, refer to the wiring diagram provided with your specific motor and ESC for the correct wire connections. Generally, there will be three motor wires that need to be connected to the corresponding ports on the ESC. Ensure that the wires are securely connected and that there are no loose connections.
Once the motor and battery are connected to the ESC, it’s time to connect the remote control. Most electric skateboard kits come with a handheld remote control that allows you to control the speed and direction of the skateboard. Follow the manufacturer’s instructions to pair the remote control with the ESC. This usually involves turning on the remote control and then the ESC while pressing specific buttons or switches.
After all the components are wired and connected, take a moment to inspect the connections and ensure everything is securely fastened. Make sure there are no loose wires or connections that could potentially come undone while riding. Additionally, check the wiring for any potential hazards such as exposed wires or areas where the wires could get pinched or damaged.
Once you have completed the wiring and connecting process, give everything a final check to ensure that all connections are secure and that there are no visible issues. Congratulations! You have successfully wired and connected the components of your electric skateboard.
Testing Your Electric Skateboard and How to Troubleshoot
Now that you have successfully wired and connected all the components of your electric skateboard, it’s time for the testing and troubleshooting phase. This is a crucial step to ensure that everything is functioning properly before you take your board out for its maiden voyage.
Start by turning on your electric skateboard and checking that the remote control is paired and communicating with the ESC. Test the acceleration and braking functions to ensure they respond appropriately. Take your board for a short test ride, paying attention to how it performs and handles. Make sure it moves smoothly and that the motor engages and disengages properly.
During the test ride, keep an eye out for any issues or anomalies. Listen for any strange sounds coming from the motor or wheels. If you notice any excessive noise or vibration, it could indicate a problem that needs to be addressed. Pay attention to the responsiveness of the remote control and how the skateboard accelerates and brakes. If anything feels off or inconsistent, it may be a sign of a wiring or connectivity issue.
If you encounter any problems or inconsistencies during testing, it’s important to troubleshoot them before continuing. Start by checking all the connections to ensure they are secure and properly connected. Look for any loose wires or connections that may have come undone during the testing phase. Check the battery to make sure it is charged and functioning correctly.
If the motor is not engaging or disengaging properly, double-check the wiring between the motor and ESC. Make sure all the wires are securely connected and that there are no loose connections. If the motor is not running at the expected speed or power, check the settings on the ESC to ensure they are configured correctly.
If you are still experiencing issues after troubleshooting, it may be necessary to seek help from the manufacturer or consult online forums dedicated to DIY electric skateboards. These resources can provide guidance and support for diagnosing and resolving specific issues.
Remember, testing and troubleshooting are an essential part of the building process. It may take some time and patience to ensure everything is working smoothly, but the effort is well worth it for a safe and enjoyable riding experience.
Safety Guidelines
As you prepare to take your newly built electric skateboard out for a spin, there are a few final thoughts and safety considerations to keep in mind. Building your own electric skateboard is an exciting and rewarding experience, but it’s important to prioritize safety and take necessary precautions to ensure a safe and enjoyable ride.
First and foremost, always wear appropriate safety gear when riding your electric skateboard. This includes a helmet, knee pads, elbow pads, and wrist guards. While it may seem unnecessary at times, safety gear is crucial for protecting yourself from potential accidents and injuries. Remember, it’s always better to be safe than sorry.
Additionally, familiarize yourself with local laws and regulations regarding electric skateboards. Different regions have different rules, and it’s essential to abide by them to avoid any legal trouble. Be aware of where you can and cannot ride your electric skateboard, and always be considerate of pedestrians and other riders.
Before each ride, take a few moments to inspect your electric skateboard for any visible issues or loose connections. Check the bolts and screws to ensure they are tightened properly and look for any signs of wear or damage. It’s better to catch any potential issues before they become bigger problems.
While riding, always maintain a safe speed and be aware of your surroundings. Start with slower speeds and gradually increase as you become more comfortable and confident. Avoid high-traffic areas and crowded sidewalks, and be cautious of any obstacles or hazards on your route.
Lastly, always ride responsibly and be considerate of others. Yield to pedestrians and follow any traffic rules or signs. It’s important to be a good ambassador for the electric skateboarding community and promote safe and responsible riding.
Building your own electric skateboard is an incredible accomplishment, and now you have the opportunity to enjoy the fruits of your labor.
Helpful Links
For all your RC Questions, Click HERE
If you are interested in RC cars and trucks, RC World has you covered.
For RC boats and watercraft, check these articles out.
For all your RC Airborne endeavors, we have everything you need.
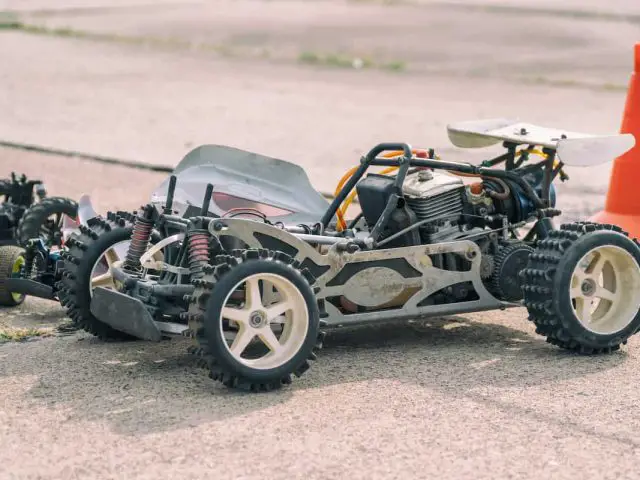
How Do Electric RC Cars Work?
If you are curious about how electric RC cars work, then read on to learn about the different parts of an RC car. An ESC controls the amount…
Electric Skateboards: Conquering Speed Racing
As technology continues to evolve and permeate every facet of our lives, so too has the realm of skateboard racing, sparking intrigue and passion in enthusiasts and hobbyists…

Mastering Electric Mountain Bikes: A Guide
With the advent of technology, mountain biking has been revolutionized with the introduction of electrically-powered bikes. As an enthusiast or a hobbyist, embracing this efficient, eco-friendly mode of…

9 Best Motor Powers for Off-Road Electric Skateboards
Embarking on an exhilarating journey through untamed landscapes requires not just courage but also the right equipment. Off-road electric skateboarding is a pursuit where the synergy between man…
How E-Bikes Can Help Your Weight Loss Journey
Are you looking for a fun and effective way to kickstart your weight loss journey? Look no further than an e-bike! These electric bicycles have been gaining popularity…
Why Choose to Upgrade Your RC Car to a LiPo Battery
You might have heard of LiPo batteries that has taken the tech world by storm. As a RC car owner, the battery is understandably half of your concern….

Outfly the Competition: How to Choose the Right FPV Goggles for Your Racing Drone
Drone racing has become a popular and exhilarating sport, with pilots flying their drones at high speeds through challenging courses. One of the key components for a successful…

14 Electric Skateboards With Customizable Speed Settings
The world of electric skateboarding has seen significant technological advancements in the past few years, transforming it from a leisure activity to one associated with speed, control and…

Thrifty Thrills: Making Electric Skateboarding Affordable
Electric skateboarding is a thrilling hobby that’s gaining popularity, but the cost of brand-new boards can be a major roadblock for many enthusiasts. If the steep price tags…

