
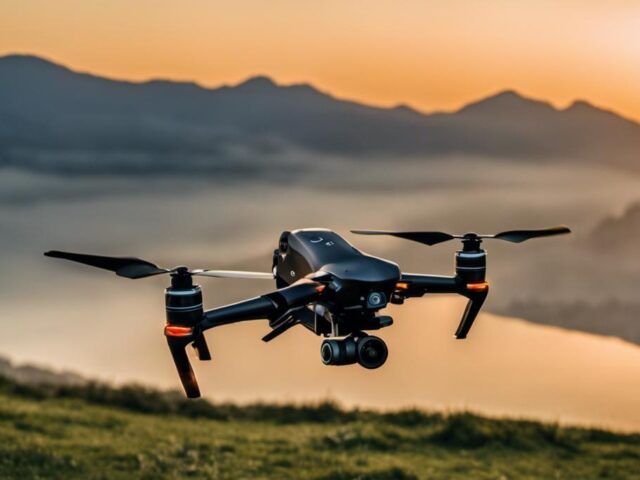
Embracing the exhilarating world of FPV (First Person View) drone flight opens up new areas of exploration and adventure. From hobbyists to professional drone racers, understanding the fundamentals of FPV drone construction and operation is an exciting endeavor. This piece will guide you through how to build an FPV drone by talking about the components and considerations needed to get you in the air, from selecting flight controllers, motors, cameras, and goggles, to selecting the perfect equipment based on cost, capability, and ruggedness.
Understanding FPV Drones
In this fast-paced world, it’s not surprising that drone technology has truly taken off, the most exciting innovations in this arena are First-Person-View (FPV) drones. They have breathed new life into the realm of aerial photography, videography, racing, and exploration. Yet, many are left wondering– what exactly are FPV drones and how do they function?
FPV Drone 101: The Basics
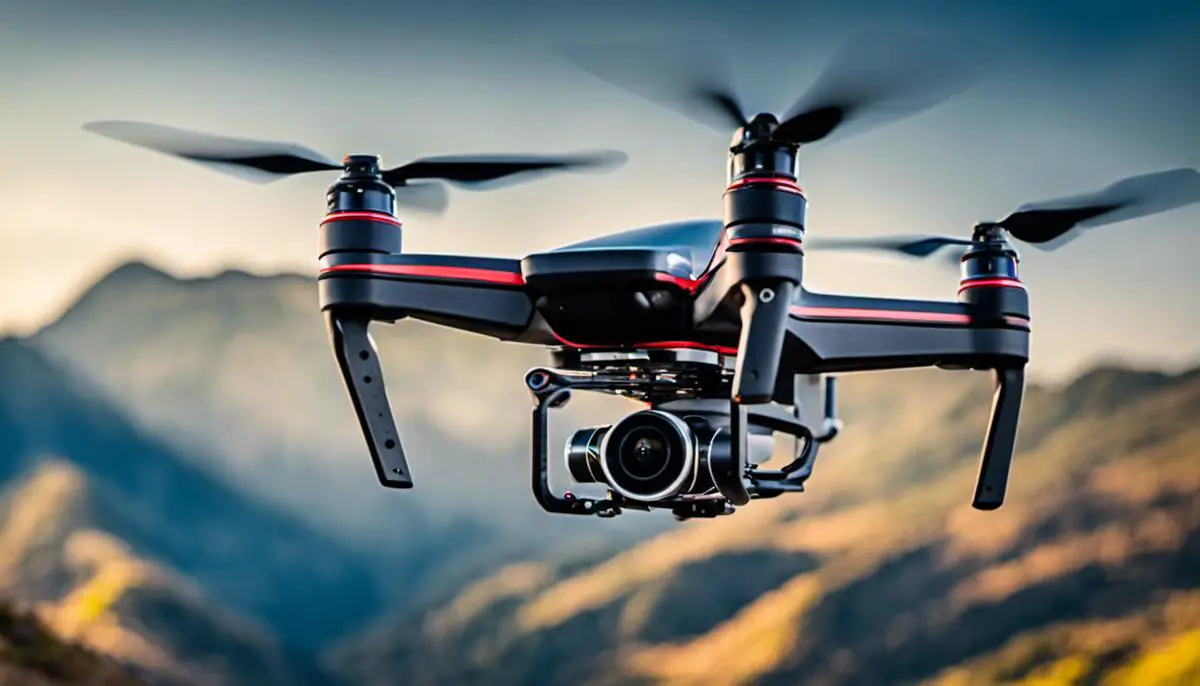
At their core, FPV drones offer a first-person view of their surroundings, quite literally sending you soaring through the skies. This is achieved by streaming live video footage from a camera perched up-front on a drone to a device in the hands of the operator. This device can be anything from a monitor, a pair of goggles, or even a smartphone. It’s like being a bird, minus fluttering feathers.
A critical feature of these drones that differentiates them from run-of-the-mill drones is the immersive experience they offer. When wearing FPV goggles, users don’t just operate the drone, they become the drone, experiencing the thrill of flight from the comfort of the ground.
The Inner Workings: From Remote to Rotor
The core of any FPV drone is its remote control system. The operator uses this to send instructions to the drone – and this is where things get truly fascinating. FPV drones typically operate on 2.4GHz or 5.8GHz frequencies for control signals, allowing them to be maneuvered with incredible accuracy.
Thanks to onboard gyroscopes and stabilizers, FPV drones can maintain stable flight even at high speeds or against wind, enhancing their efficiency and maneuverability than traditional drones.
The drone’s camera, meanwhile, plays a crucial role in creating the immersive FPV experience. It’s the ‘eyes’ of the drone, capturing high-resolution footage that is streamed in real-time to the operator.
To wrap up the inner workings, we come to the video transmission system. This system plays a vital role in delivering the video footage from the drone to the device in the operator’s hands. It’s critical to have a high-speed and reliable system here because even the slightest delay or hiccup in the video could potentially lead to a crash.
Configuration Magic – Customization is Key
FPV drones offer unparalleled flexibility in terms of customization. Operators can choose from different drone frame sizes, number and type of motor, and even the capacity of the battery. This ability to tailor the drone to the operator’s unique needs and preferences truly sets FPV drones apart in the market.

Choosing the Best Components for Your FPV Drone: A Comprehensive Guide
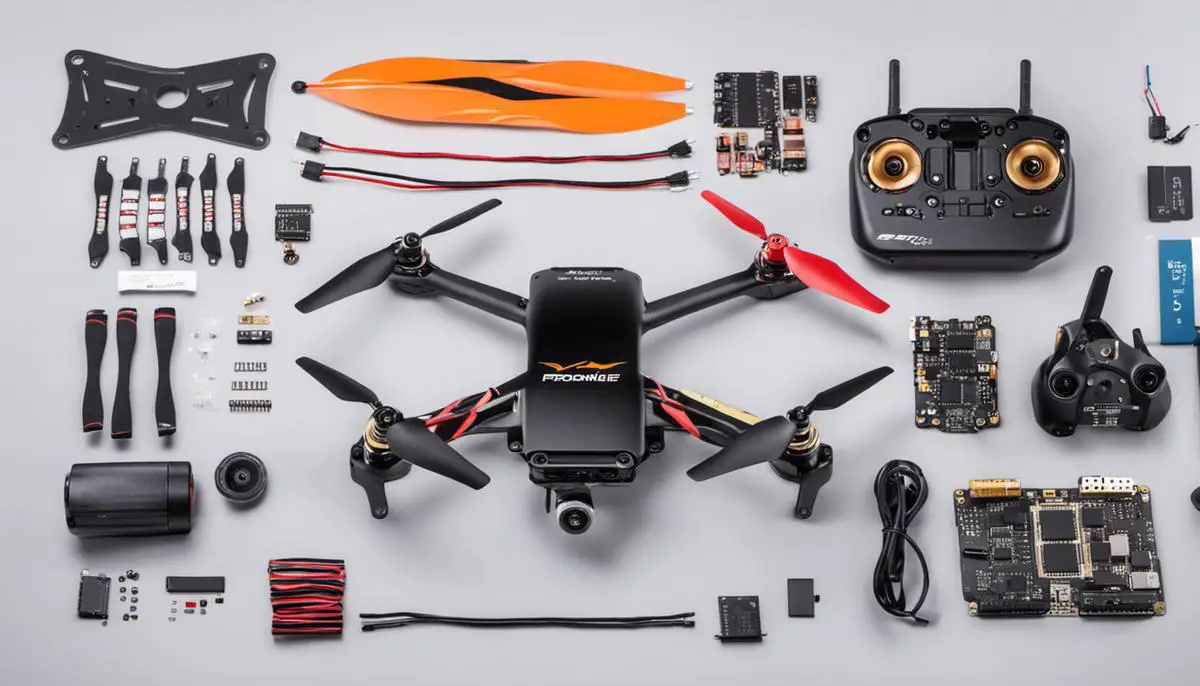
Building an FPV drone comprises several critical steps and the most important one is choosing the right components. Your selection of components not only affects the drone’s performance but also the overall FPV experience. With a myriad of options available, it can often be daunting to make the right choices.
Selecting the right components to build an FPV (First-Person View) drone is crucial for a successful build that meets your needs and performance expectations. Here’s a breakdown of the key components to consider:
1. Frame:
- Start with a sturdy and appropriately sized frame that suits your intended use (e.g., racing, freestyle, cinematography). Consider factors like durability, material (carbon fiber is common), and the size of propellers it can accommodate.
2. Motors:
- Choose motors based on the size and weight of your frame and the type of flying you plan to do. Key considerations include the motor’s size (measured in millimeters), KV rating (rotational speed), and thrust capabilities.
3. Electronic Speed Controllers (ESCs):
- ESCs control the speed and direction of the motors. Ensure they are compatible with your chosen motors and battery voltage. Opt for reliable and well-rated ESCs to avoid overheating and burnout.
4. Propellers:
- Propellers come in various sizes and styles, each designed for specific performance characteristics (e.g., speed, efficiency, thrust). Match the propellers to your motors and intended flying style.
5. Flight Controller:
- The flight controller is the brain of your drone. Choose one that supports your desired flight modes, features, and firmware preferences (e.g., Betaflight, Cleanflight). Ensure it is compatible with your receiver and ESCs.
6. Power Distribution Board (PDB) or ESC/BEC:
- A PDB or an ESC with a built-in BEC (Battery Eliminator Circuit) distributes power from the battery to various components like the flight controller and FPV gear.
7. Battery:
- Select a LiPo (Lithium-Polymer) battery with the correct voltage and capacity (mAh) for your setup. The battery’s C-rating indicates its discharge rate, so choose one suitable for your motors and ESCs.
8. FPV Camera:
- A good FPV camera is essential for clear video feeds. Consider factors like sensor size, lens type, TVL (TV lines) resolution, and compatibility with your video transmitter (VTX).
9. Video Transmitter (VTX):
- Choose a VTX that matches the frequency and power regulations in your area. Features to consider include adjustable power output, channels, and support for SmartAudio or Tramp protocols.
10. FPV Antennas: – A combination of a transmitter antenna (TX) and a receiver antenna (RX) is essential for reliable video transmission. Circular polarized antennas are commonly used for FPV.
11. Radio Transmitter and Receiver: – Select a reliable radio transmitter (controller) and receiver system. Check for compatibility with your flight controller and personal preference for features and ergonomics.
12. FPV Goggles or Monitor: – FPV goggles provide an immersive experience, but some pilots prefer using an external FPV monitor. Consider factors like field of view (FOV), resolution, and compatibility with your VTX frequency.
13. On-screen Display (OSD): – An OSD module can provide important flight data, such as battery voltage, flight time, and GPS information, directly on your FPV feed.
14. GPS Module (Optional): – If you want GPS features like return-to-home or GPS-based navigation, choose a GPS module compatible with your flight controller.
15. Receiver antennas and antenna mounts: – High-quality receiver antennas and appropriate mounts can improve your radio signal range and quality.
16. Additional Accessories: – Don’t forget essentials like zip ties, heat shrink tubing, double-sided tape, and Velcro straps for securing components and organizing cables.
Before making any purchases, research thoroughly, and consult with experienced FPV pilots or online communities to ensure compatibility and suitability for your specific goals and flying style. Building an FPV drone can be a highly customized and rewarding experience when you choose the right components for your project.
How To Build An FPV Drone: Assembling and Testing
Assembling an FPV drone can be a complex process if you haven’t done it before. However, with the right instructions and patience, you can learn how to build an FPV drone and you’ll have those parts humming in harmony with one another in no time. The process is critical to understanding your drone, its parts and how they work together to give you the best possible FPV (First Person View) experience.
Assembling Your FPV Drone
1. Gather Your Tools and Materials
Make sure you have all the necessary components in hand and then you’re ready to start assembling. Let’s go!
- FPV frame kit
- Flight controller
- Motors (4)
- Electronic Speed Controllers (ESCs) (4)
- Propellers (4)
- FPV camera
- Video transmitter (VTX)
- FPV goggles or monitor
- Radio transmitter and receiver
- LiPo battery
- Battery charger
- Power distribution board (PDB)
- Soldering iron and solder
- Heat shrink tubing
- Zip ties
- Screwdrivers and hex drivers
- Wire strippers and cutters
- Double-sided tape
- Velcro straps
2. Choose Your Components
Select your components carefully, ensuring compatibility between the frame, motors, ESCs, and flight controller. Consider factors like frame size, motor size and KV rating, and the flight controller’s features and firmware compatibility.
3. Assemble the Frame
Follow the instructions provided with your frame kit to assemble the frame. This typically involves attaching arms, mounting plates, and securing the motors.
4. Install Motors and ESCs
Begin by attaching the motors. These are typically secured onto the drone’s frame using screws. Make sure to place them correctly in line with the mounting holes on your frame. Applying a drop of thread locker on the screws can prevent them from unscrewing during the flight.
Next, connect your motors to the electronic speed controllers (ESCs). As the intermediary between the motors and the flight controller, ESCs control motor spin and direction. Solder the ESCs to the motors, making sure to connect the correct wires (usually color-coded). Quick-tip: Use heat shrink tubing to keep the soldered wires protected.
5. Install Power Distribution Board
Following this, install the power distribution board (PDB). This will distribute power from the battery to all necessary components, including your ESCs and flight controller. It’s crucial not to mix up positive and negative connections as doing so may short your system.
6. Mount and Connect the Flight Controller
Secure the flight controller to the frame, ensuring it is level and oriented correctly (usually with the USB port facing forward). Connect the flight controller to the ESCs and power distribution board. Depending on the model and type of board, there will be different steps, but you usually mount it through rubber standoffs.
Next, connect your flight controller to the ESCs. This allows your controller to direct instructions to the motors. Most controllers have a labeled spot where each ESC goes, so match them accordingly.
7. Attach the FPV Components
Mount the FPV camera and video transmitter to the frame. Connect the camera to the video transmitter and power source. Antennas should be securely attached to the video transmitter. It’s recommended to install it at the front of your drone where it has a clear range of view, non-obstructive to the propellers.
8. Install the Radio Receiver
Mount the radio receiver on the frame and connect it to the flight controller. Bind it with your radio transmitter.
9. Install the Propellers
Attach the propellers, ensuring they correspond to the rotational direction of the respective motors. Propellers are usually labeled numerically to indicate their orientation.
8. Wiring and Connection Checks
Double-check all your wiring connections, ensuring they are secure and correctly routed. Pay attention to power connections, signal wires, and ground connections.
9. Secure Components
Use double-sided tape, zip ties, and Velcro straps to secure components and wires to the frame, keeping them tidy and protected from vibration.
10. Install the Battery
Mount the LiPo battery securely on the frame, ensuring it is balanced and centered for optimal flight performance. Most frames have slots for Velcro straps. I recommend 2 straps to strap down your battery. The Velcro allows for easy removal and reinstallation of the battery when it’s charge is depleted.
Testing Your FPV Drone
Once all parts are securely connected, it’s time to test your FPV drone. Be cautious and systematic in your testing.
Firstly, check all of your solder joints. Make sure you don’t have any solder bridges causing shorts.
Next, double-check that you’ve wired everything to the correct places on your PDB and flight controller. An incorrect wiring configuration can risk severe damage to your FPV drone.
Afterward, plug in your battery (watch for magic smoke). If everything works correctly and there’s no smoking or strange noises, you can proceed to the next steps.
Connect the flight controller to your computer and configure it using the manufacturer’s software. Calibrate sensors, set up motor and flight modes, and adjust PID (Proportional-Integral-Derivative) settings. From this software, configure your ESCs, calibrate your magnetometer and accelerometer, test your motors (remove the propellers first), and program your flight modes.
Safety Precautions:
Before flying, ensure you are aware of and adhere to local drone regulations and safety guidelines. Always perform a pre-flight check, including verifying that all components are secure and that the battery is adequately charged.
First Flight:
Take your FPV drone to an open and safe area for your maiden flight and test your drone’s hover in a safe location away from people, animals, or property. Make sure you have at least one ‘Kill Switch’ programmed just in case your test doesn’t act as planned. Start with gentle maneuvers to get used to the controls, and gradually increase your flying skills.
Tune and Adjust:
As you gain experience, you may need to fine-tune your drone’s flight characteristics by adjusting PID settings and other parameters in the flight controller software.
Closing Thoughts
Learning how to build an FPV drone by assembling and testing may seem daunting at first glance, but don’t panic. Dedicate time, attention, and patience, and before you know, you’ll have your custom-built FPV drone whizzing through the sky. Building your own FPV drone can be a challenging but rewarding project. It allows you to customize your drone to your preferences and learn more about the intricacies of drone technology.
Remember to prioritize safety, both for yourself and those around you, when flying your DIY FPV drone. Not only does it give you an immersive flight experience, but also a technical comprehension to solve any troubleshooting issue in your own terms.
Helpful Links
For all your RC Questions, Click HERE
If you are interested in RC cars and trucks, RC World has you covered.
For RC boats and watercraft, check these articles out.
For all your RC Airborne endeavors, we have everything you need.

Urban Adventures: Electric Skateboarding
As metropolitan landscapes continue to burgeon with an eclectic mix of hustle and the occasional gridlock, the rise of electric skateboards as a means of city exploration offers…

Top Electric Skateboards for Tricks and Stunts: A Hobbyist’s Guide
The world of electric skateboarding is rapidly advancing, with cutting-edge boards hitting the streets and skateparks alike. These aren’t just your average skateboards; they’re marvels of modern technology…

Can RC Boats Go In Saltwater? A Helpful Guide
If you have an RC boat, there is no doubt that you know how fun they are. If you live near the ocean, you may want to try…
Master Electric Skateboard Cruising
Glide into the electrifying world of portable electric skateboard cruising, an exhilarating hobby that combines the adrenaline rush of high-speed riding with the convenience of modern technology. As…
Navigating the Legalities of FPV Drone Flying – An Enthusiast’s Guide
In the rapidly evolving world of First Person View (FPV) drones, there are a plethora of factors to consider, especially in the context of legality and compliance. Across…
How To Build An Electric Skateboard: A Simple Guide
Building your own electric skateboard opens up a new realm of personal transportation. It’s not just about the thrill and the speed, it’s about understanding the mechanics, the…
Choosing Your Off-Road E-Skateboard Wheels
Finding the right wheel size for your off-road electric skateboard is crucial for a top-notch riding experience. This article discusses the importance of wheel dimensions, motor power, rider…

Electric Skateboard: How Wheel Size Affects It
Electric skateboards offer an exhilarating blend of technology and adventure, bringing a new dimension to personal transportation and outdoor exploration. The choice of wheel size and hardness is…
How to Best Clean a Dirty Nitro RC Car to Extend Life
Nitro RC cars are almost the same as regular cars as they both use a fuel-powered engine. Therefore, cleaning them properly is necessary just like you’d have to…

